In this Blog Post:
An extensive guide on how to upload videos on YouTube, plus everything else you need to know before, during, and after uploading.
YouTube is home for countless of video contents created by influencers, gamers, artists, comedians, pranksters, vloggers, and anyone else who uploaded their videos on their YouTube channels.
Within this platform, you can watch collections of videos containing different genres with each having a different goal. Some videos aim to teach it audience skills such as cooking, playing musical instruments, painting, and the like; while some are meant to simply entertain.
Many of the videos already upload in the platform have not only managed to entertain or share knowledge with its viewers; most have even inspired others to create the content of their own.
Have you also ever watched a YouTube video and then the next thing you know you are already planning to upload one yourself? If so, you are very much free to do so.
Start by having your very own YouTube account and a personalized channel, then upload your debut video. But how to upload videos on YouTube, you ask? Here’s everything you need to know.
(adsbygoogle = window.adsbygoogle || []).push({});How to Upload Videos on YouTube Step-By-Step
Upload YouTube Videos via YouTube Studio on Your Computer
STEP 1
First, sign in to YouTube Studio. You can it by going to https://studio.youtube.com.
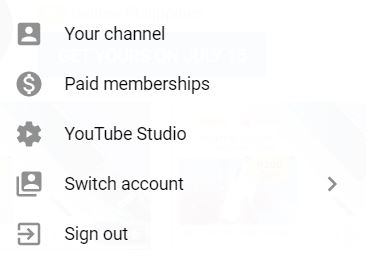
Another option is to go to the YouTube website and Sign In to your account. Then click your profile located by the upper right corner of your screen. By then, other choices will dropdown. Select YouTube Studio.
STEP 2
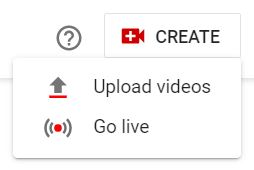
On your YouTube Studio Channel dashboard, look at the upper right corner of your screen. You will see a small, video camera icon with the word CREATE just beside your profile. Click that icon.
After clicking the CREATE icon, two options will drop down. One is Upload videos, then the other one is Go live.
Assuming that since it would be your first time uploading a video, you might probably start with uploading an already made or edited video rather than going live all of sudden. So with that said, click Upload Videos.
Where else to Find Upload Videos?
Under CREATE Icon
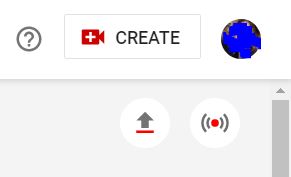
Here’s a bonus, the Upload Videos feature cannot only be found within CREATE. Just below the CREATE icon, there are two other small icons dedicated to Upload video and Go live.
That’s one less click for you if you’d go for this Upload Videos instead; but overall, it wouldn’t affect the process since it will direct you to the same page where you can upload files anyway.
Below the Text that Says Channel dashboard
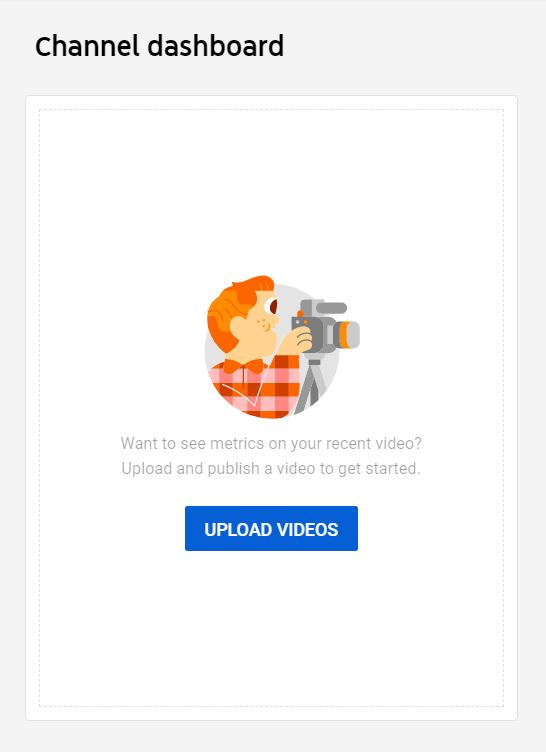
Here’s another way to use the Upload Videos. Simply click on the blue box that reads UPLOAD VIDEOS. It can be found just below the text that says Channel Dashboard. Just another option that offers one less click but doesn’t actually make that much difference either.
On “Your Channel”
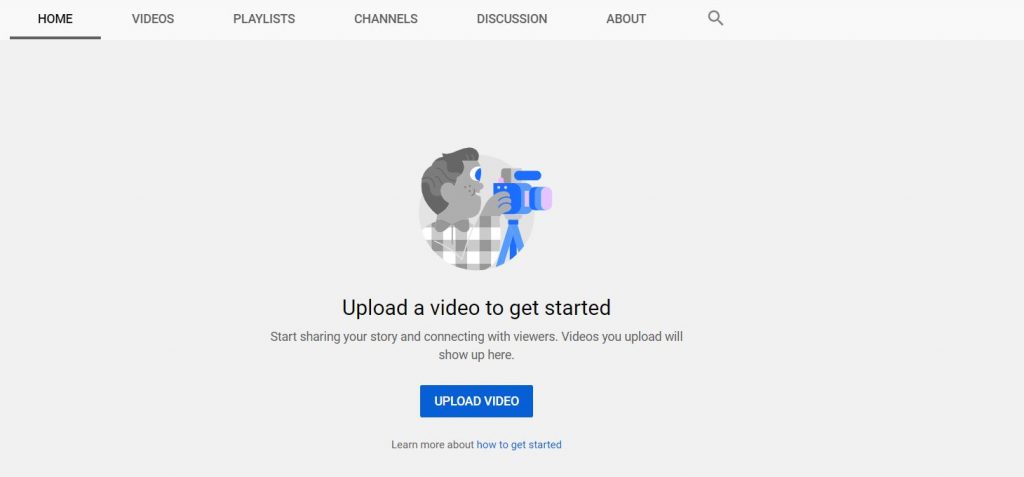
From the YouTube website, you may also go to the YouTube Studio by clicking your profile, then Your channel. On your channel page, click the blue icon that says UPLOAD VIDEO. Simply click it.
STEP 3
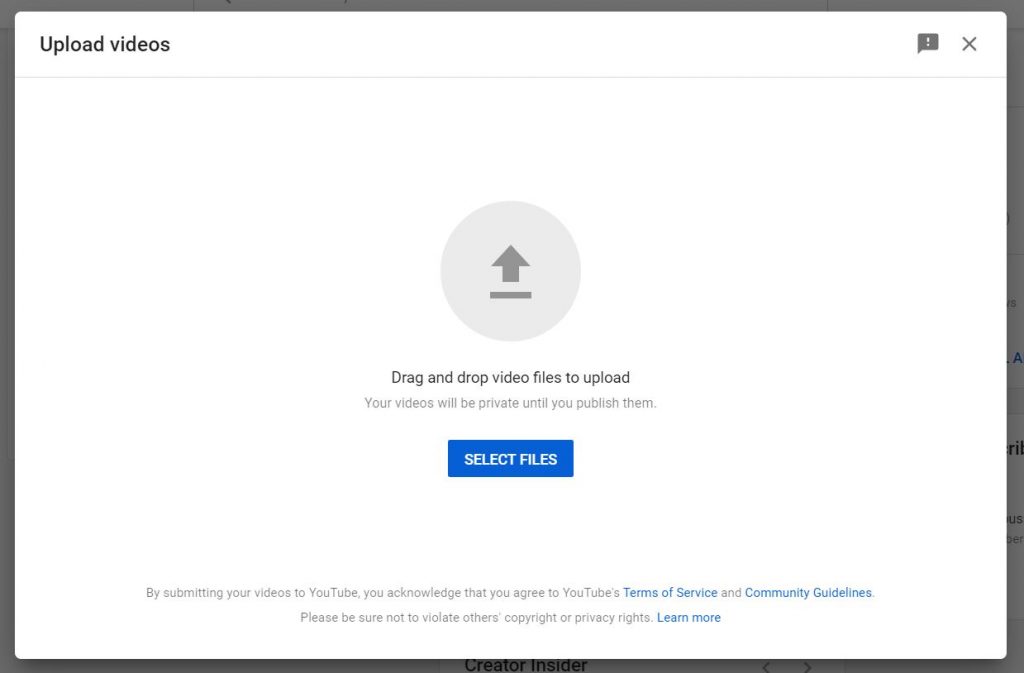
Whichever Upload Videos/UPLOAD VIDEO icon you’ve clicked, you’re bound to the same destination – the page that lets you upload your video.
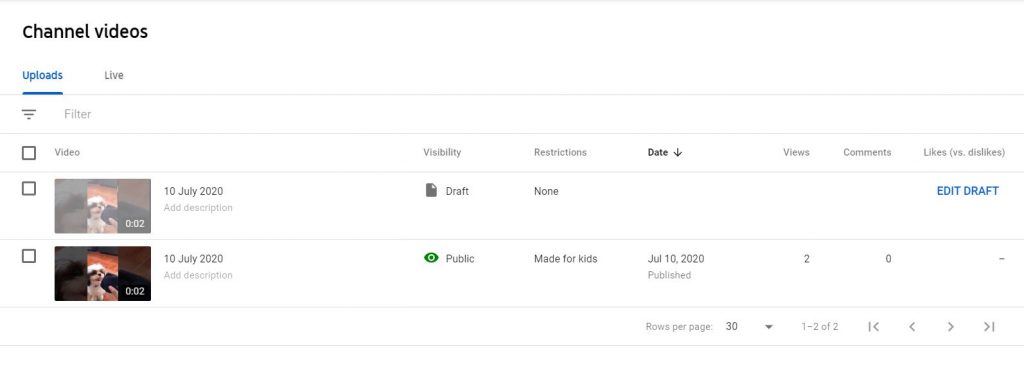
The next step is to select the file you would like to upload by clicking on the small blue icon with the words SELECT FILES. Note, however, that your videos will be private until you publish them.
STEP 5
Once your file has already been uploaded, you can now proceed with adding important details to your videos such as Title, Description, Thumbnail, Playlist, Audience, and even Age restriction if it’s not appropriate for all audiences.
Your video will be saved as a draft on your Videos page if you have closed the upload experience before you finish choosing your settings. So to be able to add the necessary details, go to the Video page the click the video Details.
STEP 6
After filling in the details, you can either click MORE OPTIONS to be able to choose advanced settings or simply click on Next to proceed on Video elements. Once done in Video elements, click Next again.
STEP 7
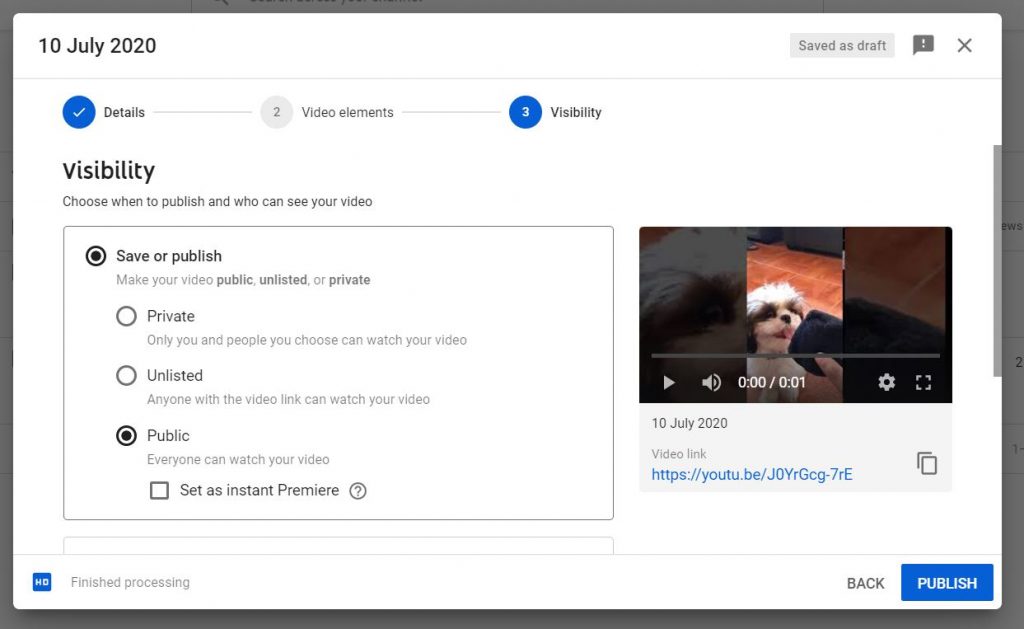
Now, set visibility. By choosing Private or Unlisted your video will be saved but not published. But by choosing Public or Instant Premiere it will be published and can be seen by everyone.
(adsbygoogle = window.adsbygoogle || []).push({});Upload YouTube Videos Using YouTube App on Android Phone
If you find sticking with your phone in everything you do online a lot more convenient, know that it is also possible to upload videos on YouTube using your mobile devices. Now the question is, how to upload videos on YouTube with your android phone? Here’s how:
STEP 1
You can do it via the YouTube App. If you don’t have the app yet, the first step is to go to Google Play and install the app for free. Once downloaded, open the YouTube app and Sign In to your account.
STEP 2
Located on the upper right corner of your screen is your profile. Tap it and reveal more options such as Your Channel, YouTube Studio, Time Watched, and many more.
STEP 3
Select Your Channel and you will be directed to your YouTube Channel. This page will appear almost empty if you still haven’t uploaded any content at all. From this page, again look at the upper right corner of your screen.
You will see three icons – a video camera or camera, a magnifying glass, and three dots. Tap the video camera/camera icon.
STEP 4
To be able to create a new video, allow YouTube access to Photos, Cameras, and microphones. Tap the blue box that says ALLOW ACCESS.
STEP 5
After doing so, you can already choose to either record a video using the app, upload an existing video from your mobile device, or go live.
Since this could be your first time to upload a video, choose an existing from your phone’s gallery instead. To do so, simply tap your chosen video.
STEP 6
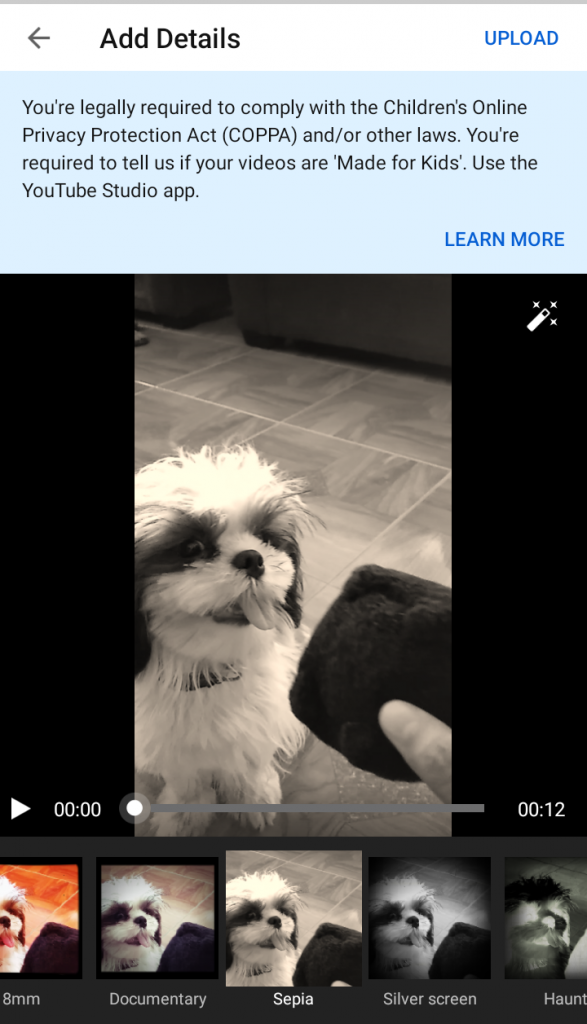
Give your video a title. The maximum number of characters allowed is no more than one hundred (100). Make it as creative or as simple you want. Other than texts, you can also use emojis.
STEP 7
Add a description to your video. The maximum characters allowed is no more than five thousand (5,000).
STEP 8
This one’s optional especially since you’ve probably already edited your video to look its best before you even planned to upload it. But if that’s not the case then you might find this step useful.
Use enhancements ready to use on the YouTube App. You can trim your video, add music, and apply filters.
STEP 8
Tap UPLOAD to upload your video. If you categorized its visibility as either Private or Unlisted, it will only be saved. But if you put it in Public it will be considered published. But this isn’t yet the last step. You are still required to finish the next one.
STEP 9
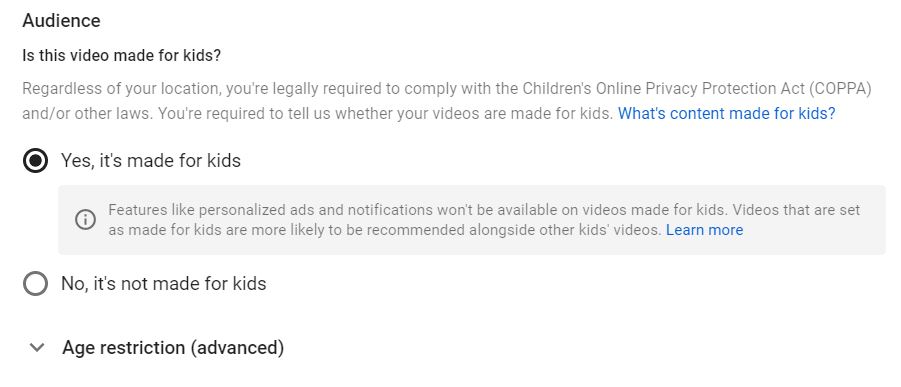
After uploading your video, visit studio.youtube.com and set your video’s audience setting. You are required to let YouTube know if your content is made for kids. This is to comply with the Children’s Online Privacy Protection Act (COPPA).
To do that, go to Video details then Audience. From there determine whether or not your content is made for kids.
(adsbygoogle = window.adsbygoogle || []).push({});Everything Else You Need to Know Before, During, and After Uploading YouTube Video
- YouTube will let you upload up to fifteen (15) videos at a time. However, if you plan to do this, be sure to click Edit on each file to edit your video details.
- Wondering if there’s a limit to how many videos a channel can upload each day? The answer is, there is. And since limits may vary by region or channel history, if you get an error saying “Upload limit reached,” just try again in 24 hours.
- Copyright strikes do not affect how much YouTube will let you upload, but Community Guidelines strikes do.
- You can’t upload audio files to YouTube such as MP3, WAV, or PCM files. But you can always use video editing tools to convert your audio file to a video file. Take for example some of the songs uploaded in the platform that only display still photos.
- Here are the following file formats YouTube can support: MOV, MPEG4, MP4, AVI, WMV, MPEG-PS, FLV, 3GPP, WebM, DNxHR, ProRes, CineForm, and HEVC (h265).
- There’s no need to add black bars to the sides of vertical videos. According to YouTube, your video will fit the screen whether it be vertical, square, or horizontal.
- When you upload a video, it means that the video file is imported to YouTube.
- When you publish a video, it means that the video is made available for anyone with access to watch it.
- There are times when YouTube already starts uploading your video while you’re recording it using the YouTube App on your android device. But they will never publish your video without your consent.
For More TechToTips
Looking for More TechToTips about tech, the internet, photography or gaming? Simply explore our TechToGraphy website and like and follow our official TechToGraphy Facebook page, Twitter, and Instagram.
We also have an official TechToGraphy YouTube channel which you can check out if you are into some tech news, unboxing, and gaming.
SOURCE
Help Center YouTube, Upload YouTube Studio
YouTube Help Center, Upload Android
(adsbygoogle = window.adsbygoogle || []).push({});For more information, see our complete guide on How to Use Zoom, a Comprehensive Guide for Starters.